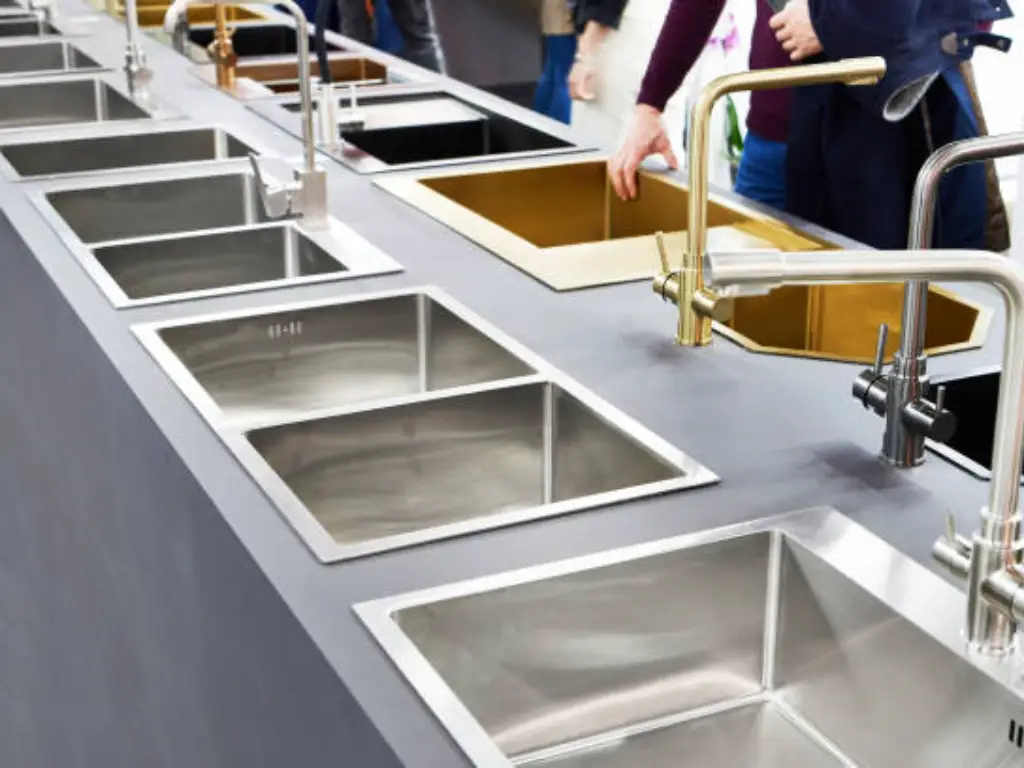
Kitchen Sink Installation Types: What Every Contractor Needs to Know
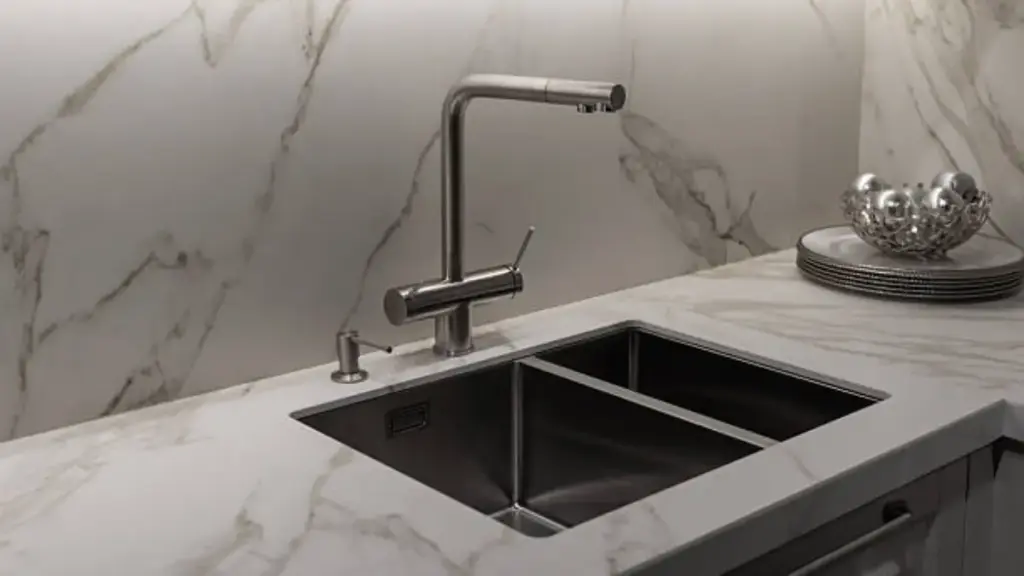
Selecting the right sink installation method affects countertop fabrication, cabinet framing, plumbing rough-in, and long-term maintenance. This guide covers the four primary kitchen sink installation types with the technical details contractors and project specifiers need.
Top-Mount (Drop-In) Sink Installation
Top-mount sinks, also called drop-in sinks, install from above the countertop. The sink rim rests on the counter surface, and the basin drops through the cutout. This is the most straightforward installation method and works with virtually every countertop material.
عملية التثبيت
The installer cuts a rough opening in the countertop, drops the sink into place, and secures it with mounting clips attached from below. A bead of silicone sealant under the rim prevents water infiltration. Standard mounting hardware includes spring-loaded clips spaced 6 to 8 inches apart around the perimeter.
Countertop Compatibility
Top-mount sinks work with all countertop materials — granite, quartz, laminate, butcher block, and solid surface. The rim covers the cutout edge, so no edge polishing is needed. This makes drop-in sinks the default choice for laminate countertops, where exposed core material would swell from moisture.
Advantages and Limitations
- Works with every countertop material without edge finishing
- Lowest installation cost and simplest rough-in
- Can be replaced without removing the countertop
- The rim sitting above the counter prevents wiping debris directly into the basin
- Visible rim creates a ledge that collects water and grime
- Reduces usable counter space around the sink opening
For projects where budget and speed matter — tract housing, rental units, light commercial — top-mount sinks remain the practical standard. Pair them with a compatible faucet configuration to complete the spec.
Undermount Sink Installation
Undermount sinks attach below the countertop, with the counter edge extending over the sink rim. This creates a clean transition from counter to basin with no visible rim on the surface.
عملية التثبيت
The sink mounts to the underside of the countertop using a combination of adhesive (two-part epoxy or specialized undermount adhesive) and mechanical fasteners. Mounting brackets or rails bolt to the sink rim and screw into the countertop substrate or a wooden support frame beneath. The countertop cutout edge must be polished or finished since it remains exposed.
Countertop Compatibility
Undermount installation requires solid-surface or stone countertops. Granite, quartz, and marble all work well because the cutout edge can be polished to a smooth finish. Concrete and solid-surface materials also accept undermount mounting.
Laminate countertops are not suitable for undermount sinks. The exposed particleboard or MDF core at the cutout will absorb water and disintegrate. Butcher block countertops present a similar risk — the exposed end grain at the cutout swells with repeated moisture contact unless sealed with meticulous attention, and even then, long-term reliability is questionable.
Structural Requirements
Undermount sinks need adequate support beneath the countertop. Heavy stone sinks (granite composite, fireclay) require a reinforced cabinet base or a wooden cleat system rated for the sink’s wet weight. Stainless steel undermount sinks are lighter but still need proper bracket spacing — typically four brackets at corners with additional mid-span supports for sinks over 30 inches long.
Advantages and Limitations
- Clean counter-to-basin transition — wipe debris directly into the drain
- Maximizes usable counter space around the opening
- Professional appearance expected in mid-range and upscale projects
- Requires stone, quartz, or solid-surface countertops only
- Higher installation cost due to edge polishing and below-counter mounting
- Replacement requires countertop removal in most cases
Undermount sinks dominate the spec sheet for custom residential and commercial projects with stone counters. They pair naturally with deck-mounted or wall-mounted faucets — see our kitchen faucet selection guide for faucet pairing details.
Farmhouse (Apron-Front) Sink Installation
Farmhouse sinks feature an exposed front panel extending past the cabinet face. The installation differs from drop-in and undermount types because the sink bears weight on the cabinet structure, not just the countertop.
عملية التثبيت
The sink sits in a dedicated base cabinet with an open or modified front. The countertop meets the back edge of the sink, typically in an undermount configuration. Side mounting flanges rest on wooden cleats or a frame built into the cabinet walls. The exposed apron front transfers significant weight to the cabinet box and ultimately the floor.
Cabinet modification is standard for retrofits — the front frame must be cut away and structural support added. New construction should call farmhouse-ready cabinets to avoid on-site modification.
Countertop Compatibility
Since the countertop meets the sink at the rear edge only, undermount attachment is standard. Stone and solid-surface countertops work best. Some installers use a top-mount approach at the rear with a backsplash that covers the junction, but this is less common in quality installations.
Weight Considerations
Fireclay and cast iron farmhouse sinks weigh 80 to 130 pounds empty. With water, the total load can exceed 250 pounds on the cabinet base. Reinforcement with 3/4-inch plywood decking inside the cabinet base is standard for heavy models. Stainless steel and composite granite farmhouse versions weigh less and may not need extra reinforcement.
Advantages and Limitations
- Distinctive visual statement — expected in farmhouse, transitional, and many custom designs
- Deeper basin than standard drop-in models — handles large pots and sheet pans
- Ergonomic front-facing basin reduces reaching over the counter edge
- Requires dedicated farmhouse cabinet or significant on-site modification
- Heavier than standard sinks — structural support is mandatory
- Apron front is exposed to kicks, scuffs, and moisture — material selection matters
For projects specifying a farmhouse sink, the farmhouse vs. apron sink comparison clarifies terminology and style variations your client may encounter.
Integral and Workstation Sinks
Integral sinks are fabricated as one piece with the countertop. Solid-surface materials allow thermoformed integral bowls. Stainless steel versions are welded on-site or fabricated off-site as a single unit. Natural stone requires CNC fabrication.
Workstation Sink Installation
Workstation sinks feature built-in ledge tracks that accept accessories like cutting boards, colanders, and drying racks. They install as either top-mount or undermount. The ledges add no external installation complexity but affect basin dimensions and minimum cabinet width. Confirm the required cabinet size against the model’s rough-in dimensions.
Advantages and Limitations
- Integral sinks eliminate the counter-to-basin seam entirely — no leak path at the junction
- Workstation sinks consolidate prep functions and reduce accessory clutter
- Integral fabrication adds significant cost — thermoforming, CNC, or custom welding
- Workstation ledges reduce effective basin width and may limit what fits inside
- Both types require precise cabinet and countertop coordination before fabrication
Countertop Material Compatibility Summary
Choosing the sink installation method without confirming countertop material is a spec error that shows up on the job site as delays and change orders. Here is the compatibility matrix:
| Countertop Material | Top-Mount / Drop-In | تحت التركيب | Farmhouse (Apron-Front) | Notes |
|---|---|---|---|---|
| Granite | Yes | Yes | Yes (rear undermount) | Edge polishing required for undermount; seal cut edges annually |
| Quartz (Engineered Stone) | Yes | Yes | Yes (rear undermount) | Does not require sealing; cut edges are non-porous |
| Laminate | Yes | No | Not recommended | Exposed core swells with moisture; drop-in is the only reliable option |
| Butcher Block | Yes | Not recommended | Yes (with sealing) | End grain at cutout requires marine-grade epoxy sealant; high maintenance |
| Solid Surface (Corian, etc.) | Yes | Yes | Yes | Best choice for integral sink fabrication; seams are thermoformed |
Sink Mounting Hardware Types
The mounting hardware varies by installation type and determines long-term stability. Here is what contractors encounter on the job:
Top-Mount Clips and Fasteners
Standard top-mount sinks use spring steel clips that hook over the sink rim and screw into the countertop substrate or a plywood mounting ring. Clip spacing should not exceed 8 inches. Stainless steel clips resist corrosion in wet environments and are required for any installation near dishwashers or in commercial applications.
Undermount Brackets and Adhesive Systems
Undermount mounting relies on two attachment methods working together: structural adhesive (epoxy or polyurethane-based) bonds the sink rim to the countertop underside, and mechanical brackets provide backup support. Common bracket types include L-brackets bolted to the sink rim and screwed into wood cleats, rail systems that span the cabinet width and attach at multiple points, and proprietary mounting frames specific to the sink manufacturer. Always use both adhesive and mechanical fasteners — adhesive alone is not sufficient for long-term reliability, especially with heavy sink materials.
Farmhouse Cleats and Frame Supports
Farmhouse sinks rest on wooden cleats (typically 2×4 or 2×6 stock) attached to the cabinet side walls with structural screws. The cleats carry the sink weight. The countertop attachment at the rear is secondary — it prevents tipping and seals the junction but does not carry the primary load. For heavy fireclay or cast iron models, some manufacturers specify a metal frame support system that distributes weight across the cabinet floor and down through the toe kick.
Plumbing Considerations by Installation Type
Each sink installation type affects the plumbing rough-in differently. Getting the plumbing alignment right before countertop installation prevents costly adjustments after the sink is set.
Drain Position and P-Trap Alignment
Top-mount and undermount sinks typically use a standard center or rear drain location. The P-trap alignment depends on the drain position relative to the wall stub-out. Rear-drain sinks free up under-sink cabinet space but may require an offset drain line to connect to the wall stub-out.
Farmhouse sinks with rear drain configurations need careful attention to the horizontal run from the drain to the wall — the deeper basin means the drain exit is lower, which affects trap placement and may require a deeper wall cavity or an extended tailpiece to achieve proper trap seal depth.
Supply Line Routing
All installation types require hot and cold supply lines with shutoff valves accessible within the cabinet. For undermount sinks, supply line connections are accessed from below — ensure adequate clearance between the sink bottom and the cabinet floor for wrench access during installation and future service.
Farmhouse sinks with their deeper basins may position the faucet mounting deck higher than standard. Verify that supply line length accommodates the faucet deck height, especially when using deck-mounted faucets with rigid supply connections.
Garbage Disposal and Dishwasher Drain
Disposal mounting is compatible with all four installation types, but undermount and farmhouse sinks offer more under-basin clearance for larger disposal units. Dishwasher drain connections to the garbage disposal or air gap fitting follow the same routing regardless of sink type — the key variable is available space in the cabinet for the drain line and air gap device.
Installation Type Comparison
| ميزة | Top-Mount / Drop-In | تحت التركيب | Farmhouse / Apron-Front | Integral / Workstation |
|---|---|---|---|---|
| Countertop Compatibility | All materials | Stone, quartz, solid surface only | Stone, quartz, solid surface | Matches countertop material |
| Installation Cost Range | $150 – $400 | $300 – $700 | $500 – $1,200 | $800 – $2,500+ |
| Difficulty Level | قليل | معتدل | عالي | High (specialized fabrication) |
| Cabinet Modification Required | Standard base cabinet | Standard base cabinet with reinforcement | Dedicated farmhouse cabinet or modification | Precise cabinet spec required before fabrication |
| Replacement Without Counter Removal | Yes | Generally no | Difficult — depends on rear attachment | No — integral with counter |
| Best Project Type | Production housing, rentals, budget commercial | Custom residential, upscale commercial | Custom homes, design-forward renovations | High-end residential, premium commercial |
FAQ: Kitchen Sink Installation Types
Can I install an undermount sink on a laminate countertop?
No. Laminate countertops have a particleboard or MDF core that is exposed at the cutout edge. Water contact with this exposed core causes swelling and irreversible damage. Top-mount is the only reliable installation method for laminate countertops. If the project spec calls for an undermount look with laminate, consider a solid-surface or quartz countertop upgrade in the sink zone.
What is the weight limit for a farmhouse sink without cabinet reinforcement?
Standard cabinet construction without reinforcement should not carry a farmhouse sink exceeding 100 pounds empty weight. Fireclay and cast iron farmhouse sinks often exceed this threshold. Always install wooden cleats rated for the sink’s wet weight or use a manufacturer-supplied frame support system. Check the sink manufacturer’s published specifications for minimum support requirements before installation.
Which sink mounting hardware is best for heavy stone composite sinks?
For stone composite and fireclay sinks, use a combination of two-part epoxy adhesive and stainless steel mechanical brackets rated for the sink weight. Rail-style mounting systems that span the full cabinet width distribute load more evenly than individual L-brackets. Always follow the sink manufacturer’s mounting hardware specifications — using undersized brackets is the most common cause of undermount sink failure.
Do workstation sinks require special faucets?
Workstation sinks do not require special faucets, but the internal ledge tracks reduce the effective opening width. A faucet with a compact base or a wall-mounted faucet avoids interference with the workstation accessories. When specifying a faucet for a workstation sink, confirm that the faucet’s spout reach and height work with the ledge-mounted accessories in use.
What is the most cost-effective sink installation for a multi-unit residential project?
Top-mount stainless steel sinks with standard mounting clips offer the lowest installed cost for multi-unit projects. They work with any countertop material, install quickly, and allow individual unit replacement without countertop removal. For mid-market projects where buyer perception matters, undermount stainless steel sinks on quartz countertops provide a noticeable quality upgrade at a moderate cost increase.
How do I prevent leaks at the sink-to-countertop joint?
For top-mount sinks, apply a continuous bead of 100% silicone sealant under the rim before setting the sink. For undermount sinks, use the manufacturer-specified adhesive on a clean, dry bonding surface and clamp until the adhesive cures. For farmhouse sinks, seal the rear junction between the countertop and sink with silicone and verify that the countertop overhangs the sink flange by the manufacturer’s specified amount. In all cases, proper sealant selection and surface preparation matter more than the installation method itself.
Specify the Right Sink Installation for Every Project
The sink installation type affects countertop fabrication, cabinet construction, plumbing rough-in, and long-term serviceability. Matching the installation method to the countertop material, project budget, and end-user expectations prevents callbacks and keeps the project on schedule.
Watersino manufactures kitchen sinks engineered for multiple installation configurations — undermount, top-mount, and farmhouse models in stainless steel, composite granite, and fireclay. Our project support team provides spec sheets, CAD files, and mounting hardware specifications to contractors and builders managing multi-unit or custom residential projects.
Contact Watersino for project pricing, bulk specifications, and installation support. Our B2B team responds within one business day with the technical documentation your project needs.